ESR Screen Protector : How To Install ESR Glass Screen Protector
By Gavin | March 02, 2022
Hi everyone, I'm Gavin, who really likes to study cell phone screen protectors.
This is my new iPhone 13 PRO Max. Today I will show you how to install an ESR screen protector properly.
The screen protector I use is an ESR product. When it comes to ESR, you may feel that it is not as well known as Zagg's invisible shield screen protector. But I think this glass screen protector from ESR is really not bad.

This is my preferred brand, and I have used ESR products in the past. They are a very, very good fit, excellent quality, and last a long time, so definitely my favorite brand of screen protector.
You can see the adorable thin sheet of glass, and you have to be careful not to bend it too much because it could break or fracture, so we don't want to do that.
ESR Screen Protector Review
Are ESR screen protectors good? I noticed that the top-notch part of this glass phone film is definitely much smaller compared to previous years. Because the iPhone 13 PRO Max and all iPhone 13 series have smaller notches.
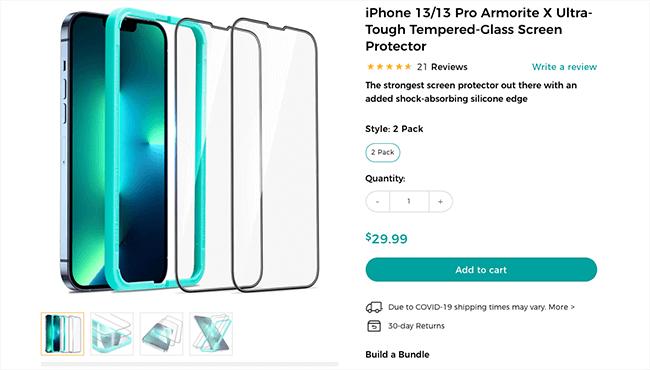
So we did get this little package, and this is our cleaning kit. The cleaning kit includes a little sticker, consists of a wipe, consists of a wet wipe. So this is very, very handy.
We definitely need those, and then the kit that comes in the package also includes this mounting tray, which is an alignment tool.
We're going to use it, so I will show you how to use all of these things properly.
About ESR Scratch-Resistant Tempered-Glass Screen Protectors
iPhone 13 Pro Max Screen Protectors & Camera Protectors
The phone screen & camera lens are the most vulnerable parts of your new iPhone, and the price to repair or replace them is high. The best way to avoid paying exorbitant fees to fix them is to keep them away from danger before they get damaged. The following iPhone 13 Pro Max camera lens protectors and screen protectors can help you.

Want to know more about ESR iPhone 13 PRO Max Screen Protector? Please check
https://www.esrgear.com/categories/iphone-13-pro-max-screen-camera-protectors/
ESR Screen Protector Installation
Having explained the ESR screen protector review above, let's move on to the ESR screen protector installation.
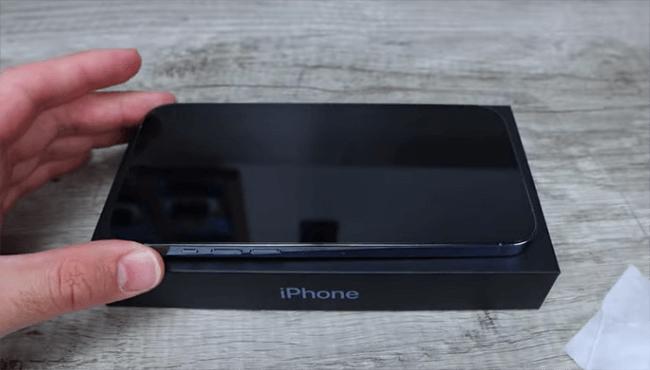
Took out my new iPhone, and we put it on the original package. It would wobble a bit because of the raised camera on the back, making it unstable on the back, but I don't believe it.
How To Apply An ESR Plastic/Glass Screen Protector
First, we will use this wet wipe to wet and wipe the phone clean first. We will get damp around the phone, do not worry about damaging your phone because iPhone 13 is waterproof.
Then, we dried it off with dry paper towels, which were provided with the ESR cleaning kit, both wet and dry. Okay, perfect, looks nice and clean.
Then we go ahead and grab the sticker here. This is to get any other dusty debris off the screen. Try to make sure you do this in a dust-free environment. At home, it is fine, and the requirements are not that strict.
I put the sticker down, then pick up your calibration tool, place it on top of the phone, and press firmly until this tool becomes wholly integrated with the phone.
Then we're going to grab our screen protector, and we're going to flip it over and pull the sticker side down. Make sure the sticker side is facing down, and we're going to do one last little dusting in case there's any other dust or handprints before we put it on.
Then, you want to quickly remove the splicing film from the back. Then from the top-down, make sure the glass protector is aligned in the tool. Put it in there, and then I know you can see it's automatically gluing and weeding out the excess air bubbles.
We can also use our fingers to gently draw a line to help the protective film quickly reject air bubbles.
Finally, we use a dry paper towel to push hard with our fingers. The purpose is to push out the residual air bubbles. Until the protective glass film is completely bonded to the phone screen. Don't worry about pushing hard.
How To Put On Esr Screen Protector
So it's different than the previous year's screen protectors, like the non-glass screen protectors. It's tough to get those bubbles out. Whereas a glass screen protector, you can just apply a little bit of pressure and push it all out, and sometimes it heals perfectly, not a single bubble at all. But sometimes it will, you can see a few drops around the edges, and that's it for us.
Conclusion
Now it looks really perfect. I feel like this ESR tempered glass screen protector has healed 100% with my iPhone 13 Pro Max.
I think the whole installation process has 2 points. The first is that we use ESR to provide professional calibration tools; the second is that the protective film is glass and can be pressed hard to eliminate all the air bubbles.
The ESR design is different from the Zagg one when it comes to this ESR calibration tool.
Zagg provides a proofreading tool that puts the phone on top of the tray. ESR puts the proofreading tool on top of the phone and travels a notch.
I personally like the design of ESR. I feel very convenient.